Invite Users
Inviting users to your Treblle workspace enables team collaboration and ensures the right people have access to your API data.
As a workspace owner or administrator, you can invite team members and assign appropriate roles based on their responsibilities.
Invite People to Your Workspace
Section titled “Invite People to Your Workspace”Using Email Invitations
Section titled “Using Email Invitations”Send direct email invitations to specific team members with customized roles and permissions.
Steps to Send Email Invitations
Section titled “Steps to Send Email Invitations”-
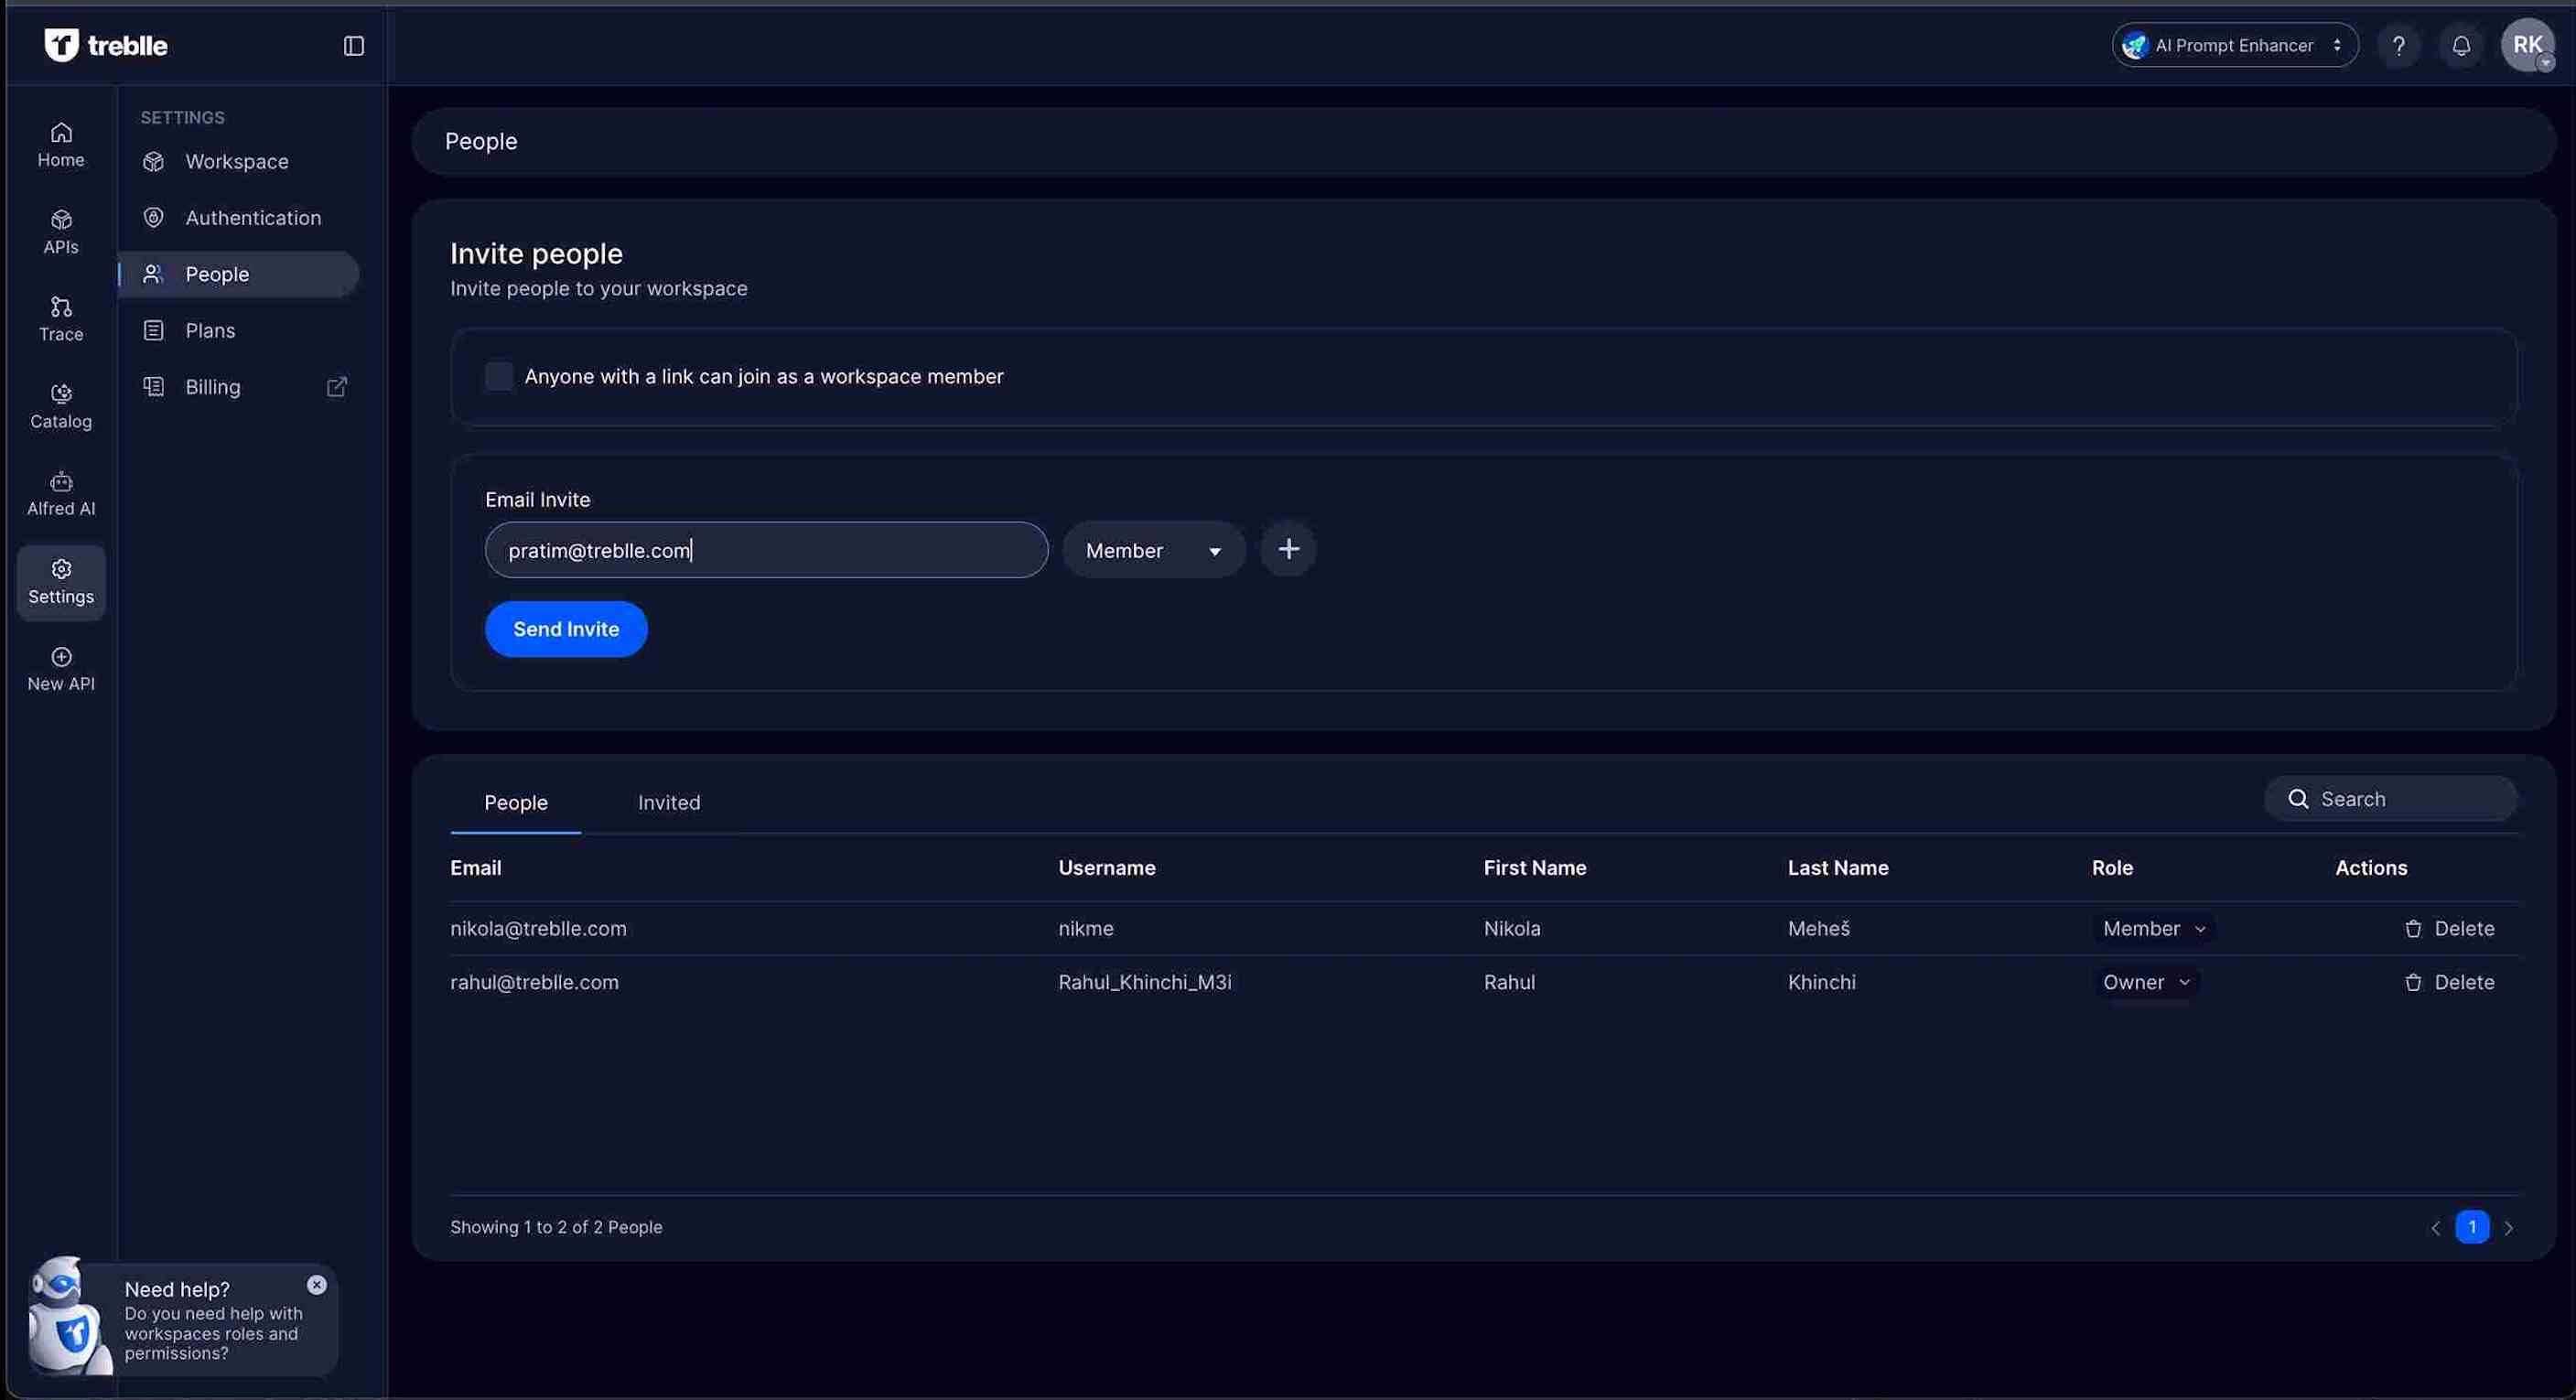
Navigate to People Settings
Go to Settings > People in your workspace navigation.
-
Enter Email Address
In the “Email Invite” section, enter the email address of the person you want to invite.
-
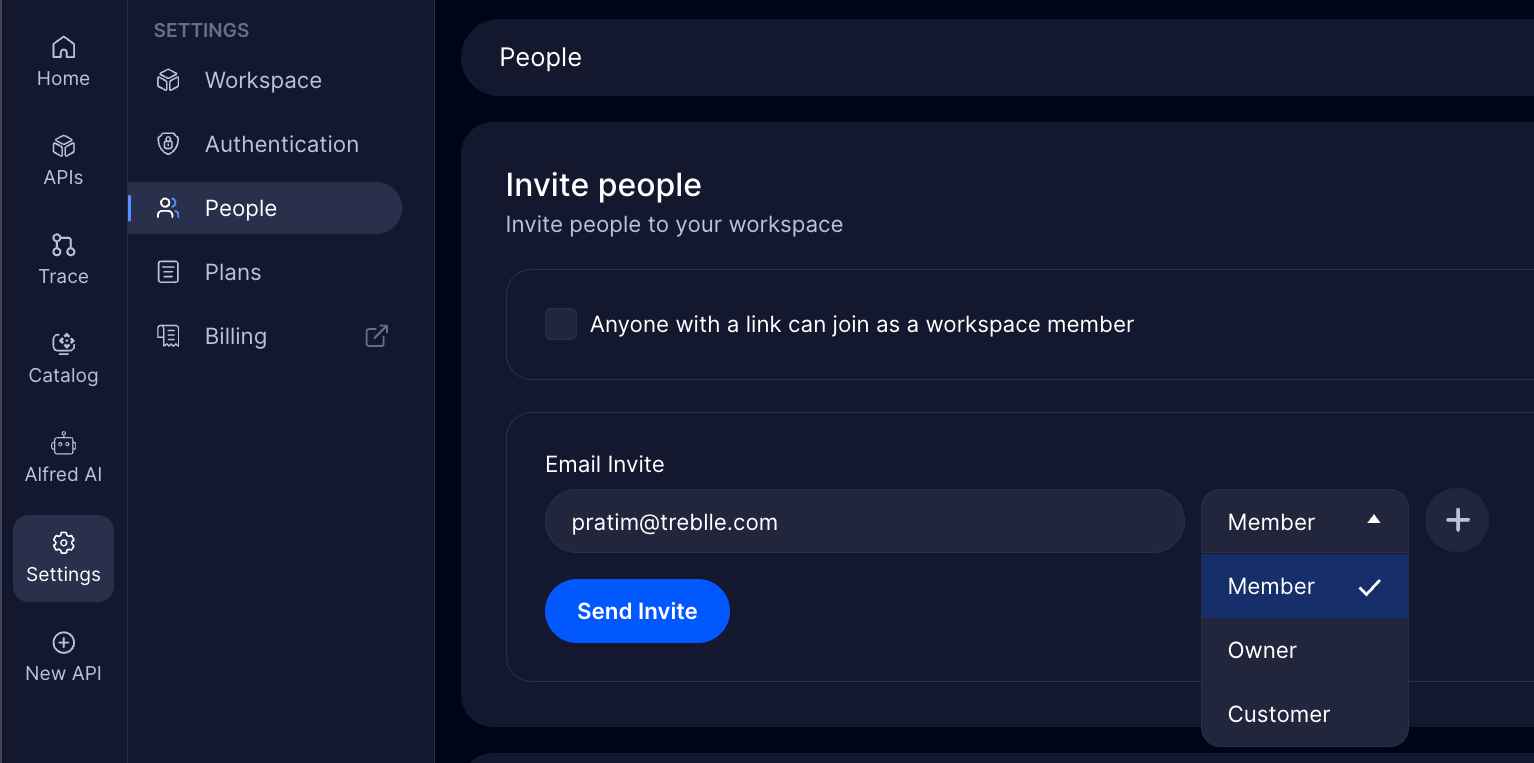
Select Role
Choose the appropriate role from the dropdown menu:
- Owner: Full administrative access to the workspace
- Member: Standard access to assigned APIs and features
- Customer: Limited access for external users
-
Send Invitation
Click Send Invite to dispatch the invitation email.
Using Invite Links
Section titled “Using Invite Links”Generate shareable links that allow anyone with the link to join your workspace as a member.

Creating Invite Links
Section titled “Creating Invite Links”-
Generate Link
In the “Invite people” section, you’ll see the option: “Anyone with a link can join as a workspace member”
-
Share the Link
Copy and share the generated invite link with team members who need access.
-
Link Management
- Links expire after 24 hours for security
- Generate new links as needed
- Monitor who joins through shared links
Managing Team Members
Section titled “Managing Team Members”Viewing Current Members
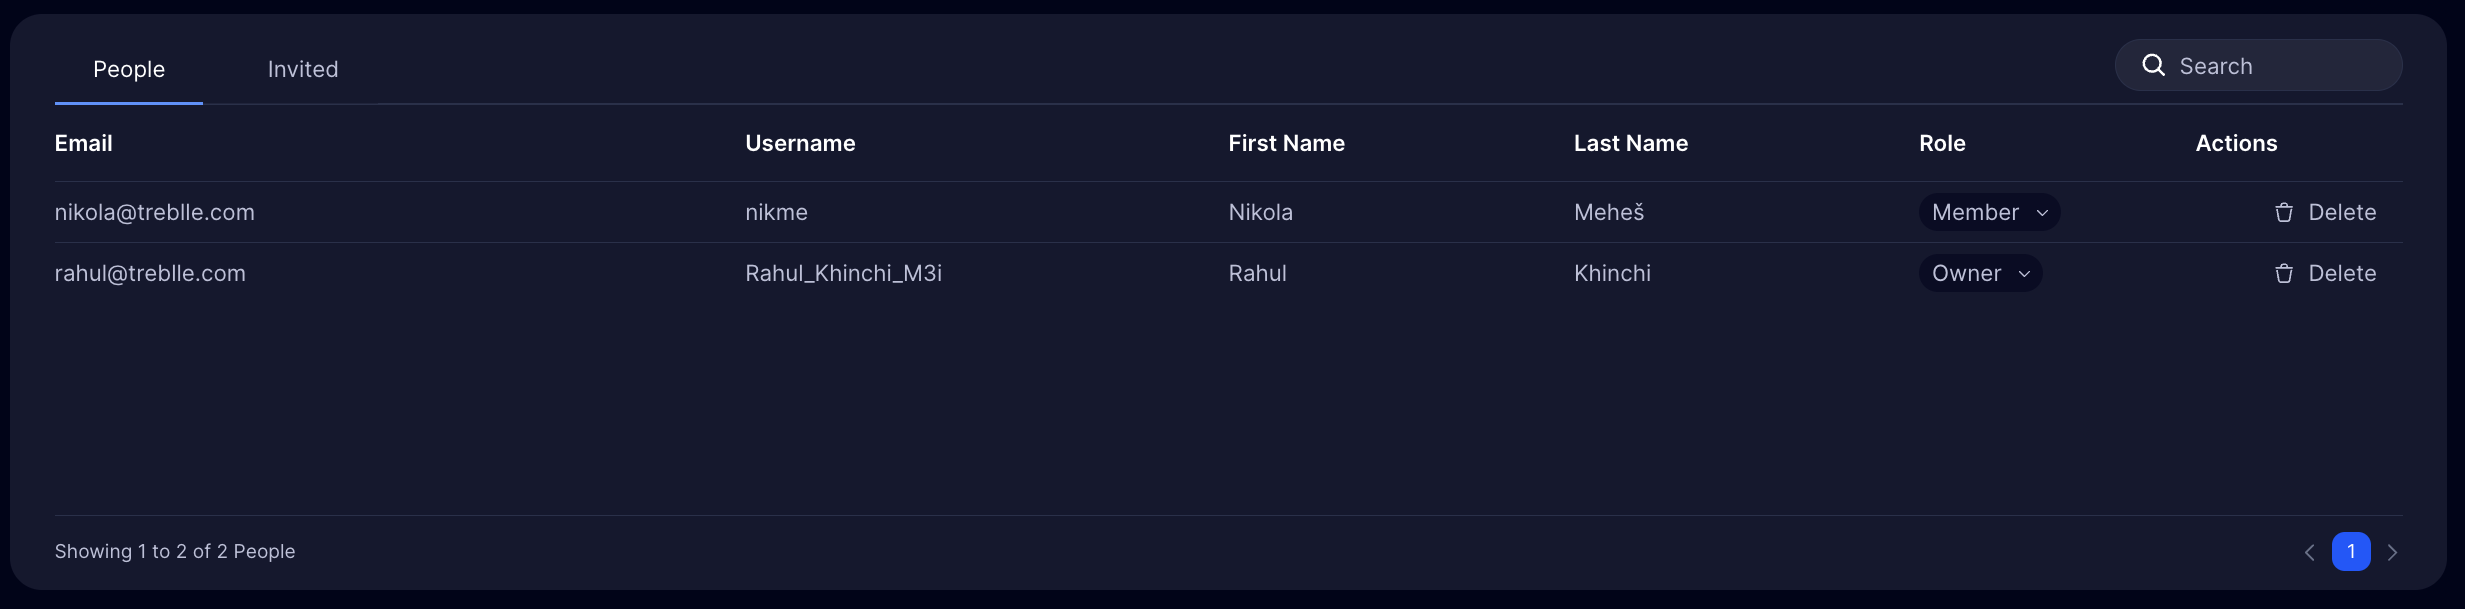
Section titled “Viewing Current Members”The People section displays all current workspace members with their details:
Member Information
Section titled “Member Information”For each team member, you can view:
- Email: Primary contact email address
- Username: Unique identifier within Treblle
- First Name: Given name of the team member
- Last Name: Family name of the team member
- Role: Current workspace role and permissions
- Actions: Available management options
Managing Member Roles
Section titled “Managing Member Roles”Changing User Roles
Section titled “Changing User Roles”-
Locate the User
Find the team member in the People list.
-
Access Role Settings
Click on the role dropdown next to their name.
-
Select New Role
Choose from available roles:
- Owner: Full workspace control
- Member: Standard team member access
-
Confirm Changes
The role change takes effect immediately.
Role Permissions
Section titled “Role Permissions”Owner Permissions:
- Invite and remove users
- Change user roles and permissions
- Access billing and subscription settings
- Manage workspace settings
- Delete or leave workspace
- Full access to all APIs
Member Permissions:
- Access assigned APIs
- View API documentation and analytics
- Cannot manage billing or remove users
- Cannot change other users’ permissions
Removing Team Members
Section titled “Removing Team Members”Steps to Remove Users
Section titled “Steps to Remove Users”-
Find the User
Locate the team member in the People section.
-
Access Actions Menu
Click the Delete action next to their name.
-
Confirm Removal
Confirm the removal in the dialog that appears.
Pending Invitations
Section titled “Pending Invitations”Managing Invited Users
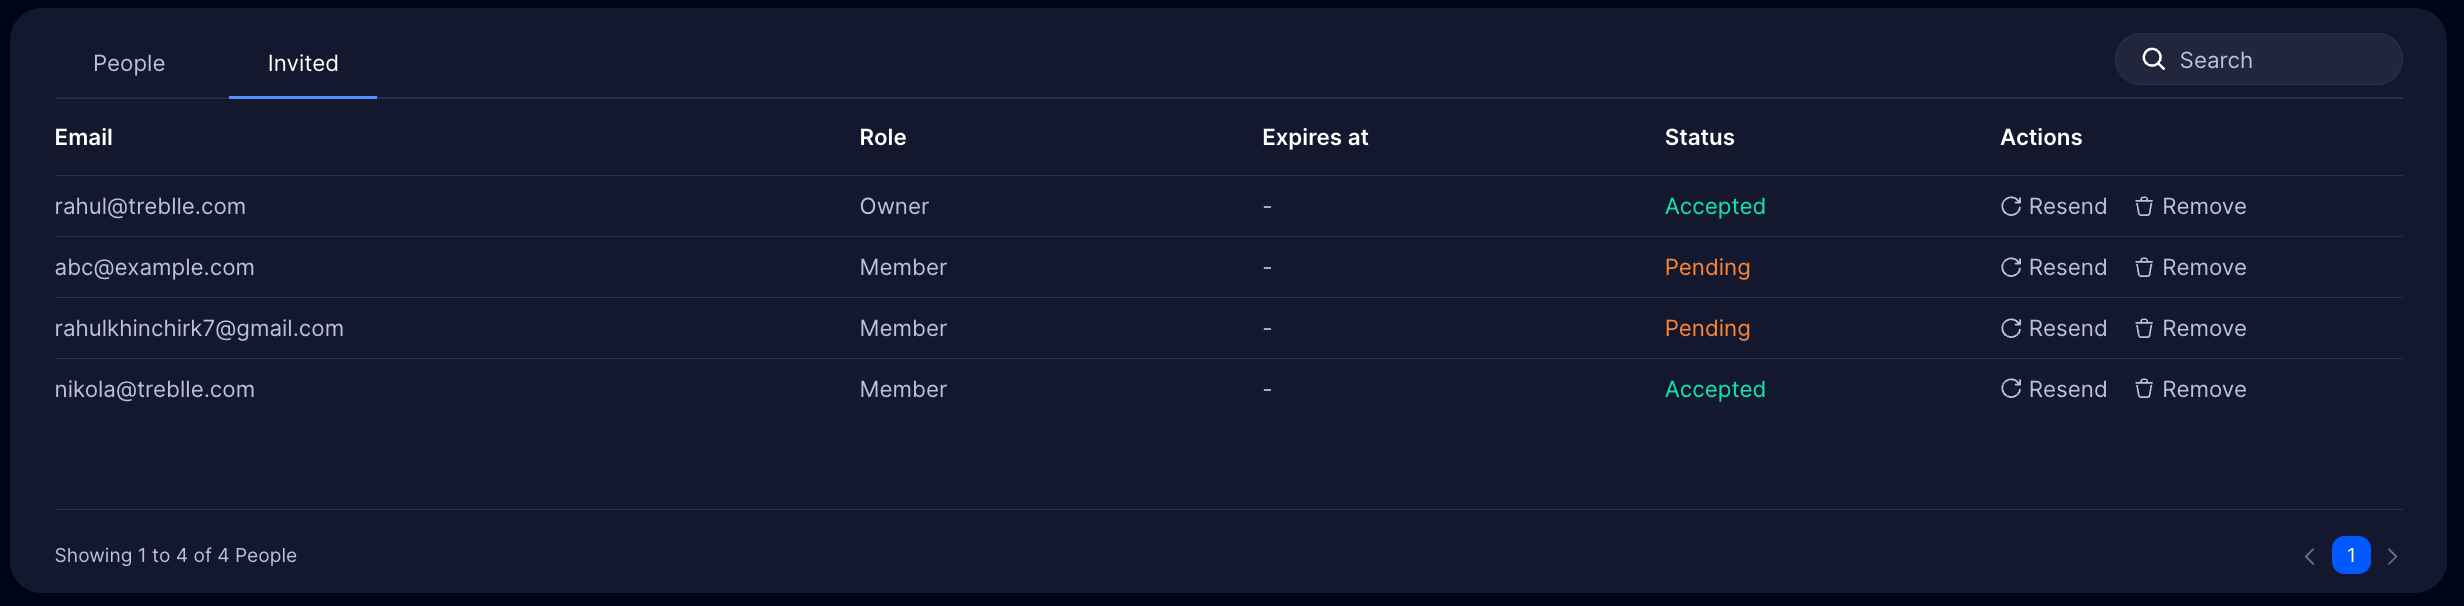
Section titled “Managing Invited Users”Track and manage users who have been invited but haven’t yet accepted their invitations.
Invited Tab Features
Section titled “Invited Tab Features”- View Pending Invitations: See all outstanding invitations
- Resend Invitations: Send reminder emails to pending users
- Cancel Invitations: Remove pending invitations if no longer needed
- Track Invitation Status: Monitor which invitations are still outstanding